
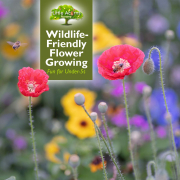
 Today’s flower-growing children’s activity follows on nicely from last month’s butterfly-counting activity. Once again, it focuses on getting children outdoors, closer to nature, and doing some good for conservation and local wildlife — including butterflies. Also, as we know, outdoor play is important and getting closer to nature is hugely beneficial to children.
This time, it’s all about growing wildflowers that help to feed pollinators and encourage them to come to gardens, balconies, patios, plant pots, and window boxes where children live. As well as butterflies, the pollinators include bees, hoverflies, dragonflies, damselflies, and some non-flying insects like beetles. What’s more, you may well find that wildflowers attract birds and sometimes even bats too!
Pollinators are not only beautiful and adorable, but they’re essential for a healthy environment and to pollinate food crops. So, all in all, this is another hugely worthwhile activity for under-fives and older children to get involved in. It’s also great fun and educational. So, without further delay, here is our simple guide explaining how children and families can start growing wildlife-friendly flowers to support and attract these magical little creatures. Enjoy!
When Children Should Sow Wildflower Seeds
It’s possible to sow wildflower seeds from March right through to mid-October or, at a push, early November so long as snow or frost is not forecast. Those sown closer to March and April will generally flower in late spring/early summer. Those sown very late in the year will flower the following year, from spring onwards. Any sown up to and including the middle period, for example during July, should still flower in the same year — wildflowers usually bloom some 60 to 80 or so days later if they’re timed to grow in the same year as they’re sown.
While pollen from the flowers is the main source of food for pollinators, the actual leaves of some late-growing varieties of wildflower plants are also useful as a food source, for example, for caterpillars. These will appear from around September followed by a second generation that will appear in April/May of the following year.
Given all of the above, the main message about timing is for parents and caregivers to plan ahead and also read seed packets and instructions carefully before sowing. In this way, children will know when to expect to see the plants, flowers, and resulting wildlife. Once the flowers and creatures appear, it’s sure to delight children!
Where to Get Wildflower Seeds
There are several ways for children and families to source wildflower seeds. The most obvious way is to buy them commercially, in seed packets. These are available from any number of different outlets including nurseries, supermarkets, wildlife/nature charities, and countless websites online (here’s a good example).
A potentially cheaper way is to scour the Internet for free wildflower seeds and you may have some luck. Timing is important because some of the free wildflower seed schemes are likely to be early in the year — March/April for example. Some environment-centric organisations and companies may also provide free packets of wildflower seeds if you simply cover the cost of postage.
The best and totally free way to get hold of wildflower seeds, however, is to keep your – and your little one’s – eyes open when you’re outdoors around nature and plants. If you time it right, you’ll spot the seed pods of naturally-occurring wildflowers and, so long as they’re ready to be harvested, you can save the seeds for your child to sow later. Perhaps use small paper envelopes, so you can write the name or description of the wildflower being saved. If children help with harvesting seeds, ensure you adhere to our health and safety guidelines at the end of this article.
What Flowers to Grow
There are several ways to decide which wildflowers to grow.
- If you buy your child commercially-available wildflower seeds, the information on the packet will often say if the resulting flowers are bee-friendly, butterfly-friendly, good for pollinators, and so on. So, if you’re sourcing seeds that way, much of the decision-making criteria around which actual flowers to grow is made clear and therefore the choice is easy.
- Additionally, of course, the visual appeal of any flower photographs on the packets will help you with your choice. You may like a mixture of colours, or perhaps you’d rather limit the colour palette to just one or two colours. Cornflowers are blue, for example, while poppies can be red, orange, or yellow, and so on. Choosing by colour also therefore makes selection easier and indeed your child will probably enjoy helping in the decision-making process. Prompting them to choose by colour and pollinator-friendliness will, however, also be educational for them, subtly teaching them the importance of helping wildlife and the environment through the power of their personal choices.
- On the other hand, if you/your child want complete control over the exact species of wildflower you/they want to see growing, then some homework will be needed unless, of course, you are already knowledgeable. The RSPB’s article on growing wildlife-friendly flowers may be a useful place to start and lists several varieties along with details of their colours.
Where to Sow the Wildflower Seeds
By their very nature, wildflowers are generally not very picky in regard to the type of soil they are happy to grow in. Therefore you/your child will have a greater choice of where to sow the wildflower seeds. A fairly clear sunny area is good, whether that’s garden beds, flower pots, window boxes, grow bags on a balcony, or even the lawn itself if you want a wild ‘meadow’ type lawn. Whatever the choice, it’s best if it’s somewhere that won’t be disturbed by you/the family though, as you wouldn’t want the wildflowers trampled once they do arrive.
How Children Can Grow the Wildflowers
Before sowing the seeds, ensure that the soil is free of weeds. Your child may enjoy helping with the weeding process or, if you are using pots and starting from scratch, you can avoid the weeding stage by using peat-free compost afresh. Either way, the topmost layer of soil will need to be loosened and raked neatly so there is somewhere for the seeds to fall and eventually embed. Again, children may enjoy getting involved in this part. If using pots or containers, ensure water can drain at the bottom, so the earth or compost will not become waterlogged later on.
With regard to sowing the seeds, follow any seed-specific instructions on packets in relation to timing and spacing. If you’re using self-harvested seeds or there are no instructions, simply sprinkle the seeds so they’re spaced, fairly evenly, i.e. not too densely sown. This will avoid the wildflower plants having to compete with one another once they start growing. A tip is to sprinkle from a height as this will naturally scatter them more widely. Once scattered, your child can help* to pat the soil surface down, either by hand or using the back of a tool like a spade or a trowel, so that the seeds are secured in the soil. Children can even ‘walk’ them in if they prefer. Once complete, ensure that you/your child keep the soil damp over the coming weeks. The preparation stage really is as simple as that!
Enjoy the Magic of Nature!
Ensure children know that they have now started a natural chain reaction that will result first in tiny shoots, then plants, then later beautiful flowers along with all the visiting pollinators, insects, birds and maybe more.
Don’t forget; following the flowering stage, the wildflowers are likely to ‘seed’ themselves at the end of their flowering season. That’s unless, of course, you/your child harvest the seeds yourselves, ready to sow at a place of your choosing next time. Some varieties of wildflowers will also naturally regrow next year — those are called perennials. — in contrast to those that only live for one year, which are called annuals. That said, even annual plants may self-seed, so their offspring appear next time, and such is the circle of life.
Nature & Forest School at Little Acorns Nursery, Clayton-le-Woods, Chorley


We hope today’s nature-based activity gives children, whether under five or older, an enjoyable time while also learning and helping to nurture the natural world. Nature teaches children a huge amount and that’s one of the many reasons why Little Acorns is a Forest School setting.
Little Acorns Nursery is an outstanding nursery/preschool in Clayton-le-Woods and the winner of an important National Nursery award. These are some of the many reasons why Little Acorns Nursery represents the very best early years childcare and education for babies and children under five in Central Lancashire. We also support Government childcare funding schemes, making it easier to afford for eligible families. To register your child for a nursery/preschool place, ask a question, or arrange a free guided tour of the setting, please select an option below:
For those not actually living in Clayton-le-Woods itself, we may also be a suitable choice if you live or work in nearby towns and villages including Clayton Brook, Clayton Green, Thorpe Green, Pippin Street, Buckshaw Village, Whittle-le-Woods, Farington, Bamber Bridge, Lostock Hall, Euxton, Leyland and Penwortham.
* Health & Safety of Little Ones
Parents/caregivers should supervise and accompany children, especially the very young, at all times to ensure their safety and well-being. For example, special care should be given near hazards including garden ponds, trip hazards and unhygienic areas. Children should be taught good practices around hygiene and self-care including the avoidance of poisonous plants, care around unhygienic soil, non-ingestion of seeds, avoidance of germs and so on. Keeping hands and fingers away from faces during outdoor activities, perhaps even wearing protective gloves when touching natural things like earth and plants, and washing hands with soap and water after outdoor activities, are also good examples to set for children.

")
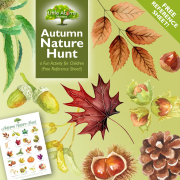
 By mid-November, autumn is in full swing and leaves are turning a myriad of different colours. Scenes of green, yellow, red and golden trees can be breathtakingly beautiful and the air is often crystal clear at this time of year — that’s great for photos! The autumn season also brings with it a treasure trove of fascinating natural things that children can discover if they take the time to look. Indeed, an autumn nature hunt is the perfect excuse for little ones to spend some time outdoors, where they will also benefit from outdoor play and everything that nature has to offer children. Whether finding gorgeous sweet chestnuts, cute acorns, dangly catkins, fascinating fir cones or highly coloured leaves, children will love an autumn treasure hunt and are sure to be enthralled by what they find. It’s a magical time of year! With all that in mind, we have prepared a free activity sheet that children and families can download, print out, and take with them as a visual reference when they next venture outdoors. We suggest children make a start soon, while all the natural wonders are abundant. Download your free Autumn Nature Hunt Reference Sheet (preview below) and get started today!
.")
 Ensure children, particularly the very young, receive appropriate adult supervision at all times. Although fascinating and fun, the outdoors holds many hazards for the unwary. Therefore, children will need to be closely monitored by a responsible adult in order to safeguard their well-being.
 Ensure children, particularly the very young, receive appropriate adult supervision at all times. Although fascinating and fun, the outdoors holds many hazards for the unwary. Therefore, children will need to be closely monitored by a responsible adult in order to safeguard their well-being.
")
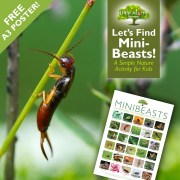
 Children and parents, let’s go minibeast spotting! Whether you have a garden, neighbourhood park, or just a few potted plants, there are bound to be minibeasts visiting or living there. What’s more, summer is the perfect time to spot them. Spending time in
 .")

 Today’s flower-growing children’s activity follows on nicely from last month’s
  It’s possible to sow wildflower seeds from March right through to mid-October or, at a push, early November so long as snow or frost is not forecast. Those sown closer to March and April will generally flower in late spring/early summer. Those sown very late in the year will flower the following year, from spring onwards. Any sown up to and including the middle period, for example during July, should still flower in the same year — wildflowers usually bloom some 60 to 80 or so days later if they’re timed to grow in the same year as they’re sown.
 There are several ways for children and families to source wildflower seeds. The most obvious way is to buy them commercially, in seed packets. These are available from any number of different outlets including nurseries, supermarkets,
  If you buy your child commercially-available wildflower seeds, the information on the packet will often say if the resulting flowers are bee-friendly, butterfly-friendly, good for pollinators, and so on. So, if you’re sourcing seeds that way, much of the decision-making criteria around which actual flowers to grow is made clear and therefore the choice is easy.
 By their very nature, wildflowers are generally not very picky in regard to the type of soil they are happy to grow in. Therefore you/your child will have a greater choice of where to sow the wildflower seeds. A fairly clear sunny area is good, whether that’s garden beds, flower pots, window boxes, grow bags on a balcony, or even the lawn itself if you want a wild ‘meadow’ type lawn. Whatever the choice, it’s best if it’s somewhere that won’t be disturbed by you/the family though, as you wouldn’t want the wildflowers trampled once they do arrive.
 With regard to sowing the seeds, follow any seed-specific instructions on packets in relation to timing and spacing. If you’re using self-harvested seeds or there are no instructions, simply sprinkle the seeds so they’re spaced, fairly evenly, i.e. not too densely sown. This will avoid the wildflower plants having to compete with one another once they start growing. A tip is to sprinkle from a height as this will naturally scatter them more widely. Once scattered, your child can help* to pat the soil surface down, either by hand or using the back of a tool like a spade or a trowel, so that the seeds are secured in the soil. Children can even ‘walk’ them in if they prefer. Once complete, ensure that you/your child keep the soil damp over the coming weeks. The preparation stage really is as simple as that!
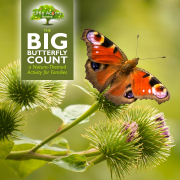

 Many will have heard of the Big Garden Birdwatch that takes place every year in January. However, fewer are aware of a similar activity called The Big Butterfly Count that takes place in July and early August. As well as being extremely worthwhile, it’s a wonderful activity for both children and adults to get involved in as citizen scientists. The activity helps with butterfly conservation, is educational for those taking part, and encourages families to get outdoors, closer to nature. And, as we know,


")
 for download instructions.") Are you looking for a fun and educational activity for your children? Why not encourage them to do some bird spotting? Not only is it a great way to spend time outdoors, but it’s also a wonderful opportunity for them to learn about nature and develop observation skills. As we know,
Are you looking for a fun and educational activity for your children? Why not encourage them to do some bird spotting? Not only is it a great way to spend time outdoors, but it’s also a wonderful opportunity for them to learn about nature and develop observation skills. As we know,  then print out or view on screen.")
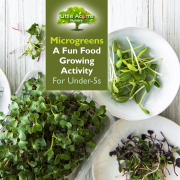

 As promised in our recent
  Microgreens, also known as micro leaves, are the young shoots of growing plants that are edible. Examples include the seedlings of herbs like basil and coriander, red cabbage micro leaves and the shoots from root vegetables like beetroot. When growing, the seedlings form a thick and rich ‘carpet’ of shoots that, when ready, can be snipped off en masse and used in meals as salads or garnishes. What’s more, they’re delicious, highly nutritious and make meals look amazing. The entire activity can also be accomplished indoors in any home. You do not need to have a garden because a well-lit windowsill or counter top will more than suffice.
 Microgreen seeds. These are available inexpensively online or at places like garden centres and even some supermarkets. You can buy microgreen mixed seeds or choose seeds for rocket, beetroot, spinach, red cabbage, fennel, broccoli, radish or mustard. Each has a distinctive look, when growing, and flavour, when eaten. Read the packets for more detail or just have fun and experiment!
 Different microgreen seeds grow at different rates but usually a dense carpet of growing shoots and tiny leaves will cover the trays or pots within one or two weeks. Generally speaking, when you can see small, immature leaves at the top of shoots about 1 to 1¼ inches tall, they are about ready to be harvested. For young children in particular, snipping them off is best done by parents, to avoid injury. The carpet of microgreens can be snipped off, using scissors, low down near where the shoots begin. It’s best to snip them off rather than to pull them up by the roots because then they have the chance to regrow and give you/your child a second crop later on. The microgreens can then be washed in a fine colander, under a cold tap, to remove any remnants of soil.
 Your child can then continue the fun by helping with meal preparation (with adult supervision for safety). Microgreens make wonderful garnishes, are lovely in salads and sandwiches and can also be added to things like soup, risotto, pasta, baked potatoes and burgers. They are incredibly attractive to look at, jazzing up any meal and also giving children extra nutrients to consume. They are also a great way to encourage children to try new tastes and food textures.
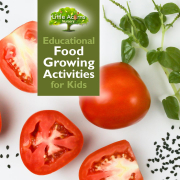

 and that’s just one of many reasons why little ones should be encouraged to learn about sowing seeds and growing their own plants. Today, we’re taking that a step further by explaining how children can grow plants that will give them real, edible food! With a little planning, care and effort, children can grow herbs, vegetables and even fruit if they put their minds to it. What’s more, it’s possible without a garden and needn’t cost a penny!
 That will never be more evident than when a seed has grown into a plant that bears fruit, which contains more seeds, through which the whole process can start again.
 Seeds for herbs, vegetables and microgreens are all widely retailed in places like garden centres and even some supermarkets. Each seed packet will usually explain when and how seeds can be planted. This is perhaps the most obvious way for children to grow plants that, if all goes well, result in a healthy crop of food. However, we can be far more adventurous than that! Where is the fun in buying seeds in packets when children can get them for free? Let’s take a look at some cheaper and far more creative ways that children can start things off.
 “Free” you say? Well, pretty much! Next time you have some shop-bought tomatoes and/or peppers as part of your ordinary shopping, get your little one to take a few moments to save some of the seeds. These are found within things like tomatoes, before they’re eaten, and are usually discarded in the case of peppers. Such seeds can simply be spaced out on some compost or earth, watered in and a thin layer of soil or compost added on top. If these are left on the windowsill and the earth kept moist by the child over the coming days, little seedlings will soon start to appear.
  The image of the green plant shows our pepper seedling grown in this exact way — and it was incredibly easy to achieve. Ours is about 3 or 4 weeks old and it’s just about ready to be “planted out” outdoors, to mature. Once mature, they should flower then sprout some new peppers! It’s identical for tomatoes. If children have no garden for larger plants to be transferred to, ‘grow bags’ or any kind of suitable container can be used on a patio or balcony. Children will need to keep watering them every day, to keep the soil moist. Flowers will eventually appear and, with a little help from bees and insects, will be pollinated so that they eventually ‘fruit’. If appropriate care and attention continues, your child will eventually end up with vegetables that can eventually ripen and be eaten. That’s free tomatoes and peppers for the family, in our examples. Don’t forget to remind your child to save a few more seeds, though, so they can repeat the whole process again … and again!
 Does your little one know that he/she can grow new herb plants totally free of charge? This is done simply by clipping cuttings from your usual shop-bought herbs and leaving them in water to root. It’s incredibly easy so long as the child has some patience (that’s another useful lesson for them). All the child needs to do is to save some small (3 or 4 inch long) cuttings from the tips of herbs like basil or coriander. For safety, parents/carers may need to help with the cutting part if the children are very young.
  The bottom sections of the clipped cuttings should be dangled into a glass, small bottle or other suitable vessel of water and left over a period of days until they sprout roots. See the photo for an example. A clear water vessel, e.g. drinking glass, will allow your child to clearly see the roots. Once suitably long, these new little plants can be transplanted individually into compost/soil in something like flower pots — or indeed a free, recycled alternative like a yoghurt pot. The little ones will need to continue attending to the plants with regular watering so that the herbs grow and mature. This activity can all be done indoors on a windowsill too, so requires minimal space. Growing their own herbs may even make children more inclined to eat them!
 Another ridiculously easy way to grow food is to “re-grow” it. A classic example of this is to save the root section from a salad vegetable like iceberg lettuce or celery. This is the part of a shop-bought vegetable that would normally be cut off and discarded. However, in what has to be the easiest food growing activity of all, the child simply needs to keep that root section and leave it root down in water for 1 to 3 weeks. It will eventually grow some roots but, before that, the upper tip will start to sprout new leaves. In our own test using an iceberg lettuce we ended up with loads! That is new, free salad that can be later harvested and eaten. Simple!
 (Speaking of iceberg lettuces): Excuse the pun, but the ideas above are just the tip of the iceberg! There are so many other types of vegetable and fruit that children can grow (or re-grow) for next to nothing. For example, they can grow new apple trees from apple pips and new strawberry plants from the outside skin of strawberries. And the whole topic of
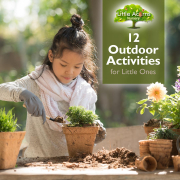

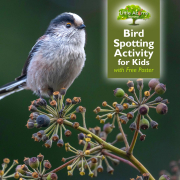
 1. Bird spotting
 ee & Butterfly Spotting
 3. Search for Animal Tracks
 4. Make a Den
 5. Float a Boat
 6. Go on a Ramble
 7. Get into Photography
 8. Obstacle Course
 9. Have a Picnic
 11. Hunt for Mini Beasts
 12. Get Creative with Rocks & Stones
 Whether on the beach or in the garden, it’s surprising how creative children can be with stones and rocks! Stones can be painted with lovely patterns or images, perhaps combined with simple words or as part of a ‘stone story’. Bigger rocks can be piled one on top of the other to form sculptures — these look magical. Children will love these and other creative activities that they can take part in outdoors, with simple stones and rocks.
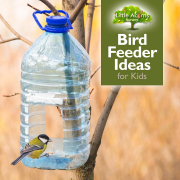

 Making bird feeders


 Seeded pine cone bird feeders
  Water bottle bird feeders.
.") Then, they can be partly filled with bird seed, or perhaps grated Cheddar cheese. Alternatively you can see that some of the designs could be used for drinking water, for example the one shown immediately on the left or at the very top of this article. Another variation even has a plastic spoon pushed into it, forming a convenient perch for the birds to land on and to feed from (see right).
Then, they can be partly filled with bird seed, or perhaps grated Cheddar cheese. Alternatively you can see that some of the designs could be used for drinking water, for example the one shown immediately on the left or at the very top of this article. Another variation even has a plastic spoon pushed into it, forming a convenient perch for the birds to land on and to feed from (see right). Carton bird feeders
 Monkey Nut Bird Feeders
 If using peanut butter in your home-made bird feeders, ensure it is fresh, has no salt or sugar added and is not ‘flavoured’. Smooth or crunchy peanut butter is great for bird-feeders, though, and you can even stick extra bird seed to it once it’s been spread on your feeder e.g. pine cone or apple. There are also some peanut butter brands made specifically for wild birds, by the way.
 Why Nature is So Important for Children
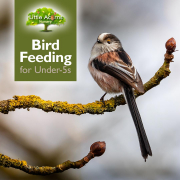


 Providing food for birds is a win-win for everyone — humans and birds alike. Birds obviously get to eat much needed food without huge effort and children get to learn more about nature and perhaps individual bird visitors. (We even name our regulars! “Vern” is a tame blackbird, for example, having been named after a character in the famous movie Rain Man). By encouraging birds to visit, children will soon be able to recognise and name the different species of bird too, particularly if given some help from a parent or bird book. Visitors might include robins, blackbirds, blue tits, great tits, long-tailed tits (our favourite), thrushes, starlings and, if they’re lucky, more unusual, colourful birds like nuthatches, woodpeckers, bull finches and gold finches. As it gets colder, some species will travel to warmer countries to overwinter. For those that stay in the UK, however, food from a friendly young nature-lover will be a real lifeline.
 If children do get involved in feeding wild birds, they’ll soon begin to realise how delightful the little beings are. They each have their own character, likes and dislikes. Children will get to appreciate this if they keep up the feeding and the birds will soon realise where to find the food each day. Children will get to understand the importance of nature and learn skills like empathy, understanding and responsibility as they nurture the wellbeing of these beautiful wild visitors. Animals, birds and insects are all individuals and it’s good for children to recognise this. By feeding birds and other animals, they will also be able to continue to appreciate nature and the natural world, just like they do in our
  There are many bird feeders available to purchase in supermarkets and local shops, although we simply buy ours as part of our weekly online supermarket shop. Many are quite inexpensive. From fat balls and filled coconut shells, to seed cakes, hanging dispensers and pre-filled seed feeders, the variety available gives parents and children a huge choice. In our own garden, we have found that
  Grated Cheddar cheese (mild and in moderation) will be very popular. Robins, blackbirds, sparrows, starlings, pigeons and doves adore it! Mouldy or ‘blue’ cheese should be totally avoided, though, as the mould could harm or even kill birds. Meanwhile, bread will fill birds up but it doesn’t hold much nutritional value for them, so only feed bread to birds in moderation. It’s incredibly important not to feed them mouldy bread too, or for it to be left to go mouldy once outside. Mould can greatly harm or even kill birds.
 The RSPB provides
  Window recesses, higher windowsills and balconies will usually offer some kind of suitable site for feeding birds. Careful choosing of the site for your bird feeders is an important consideration, however, which could make or break your feeder’s success and the wellbeing of the birds you are trying to help.
 A Word About Hygiene for Your Family & the Birds
