


 One of the first challenges when considering childcare for your little one is how to fund it. If you’re an affluent family, then great. However, if childcare costs will be a more significant hurdle to overcome, the good news is that there are lots of options available. Either way, it will help to be well-informed about the various childcare funding schemes on offer from the Government. There are quite a few of them and some are extremely generous and surprisingly easy to obtain. Today’s Quick Guide to Childcare Funding Options in England will give you an at-a-glance overview of what’s available, the key eligibility criteria and how to apply. Note, though, that they generally fund in-person childcare only from approved providers (like Little Acorns). Take a look at the many options …
Childcare Vouchers:
 You’ve no doubt heard of, or read about, childcare ‘vouchers’. They sound great, but what are they and how do you get them?
How To Get Childcare Vouchers
For those who are eligible, Childcare Vouchers are available through employers who participate in the ‘Employer-Supported Childcare’ scheme. In effect, it’s a salary sacrifice scheme, but with tax and National Insurance savings.
How Much Funding Can You Get?
Up to £55 of your earnings can be paid into the childcare scheme each week and the benefit is that the payments are free of income tax and National Insurance. If you’re eligible, your childcare costs you less, in effect.
Eligibility
Childcare Vouchers are not so widely available as they used to be because the scheme has closed to new applicants. However, they’re still available to those who enrolled before the 4th of October 2018. Your children must be no more than 15 (16 if disabled) and how much you are eligible for will depend on when you joined the scheme and how much you earn. They cannot be claimed if you are claiming Tax-Free Childcare (see below).
Tax-Free Childcare:
 Tax-Free Childcare is a great scheme which, in contrast to childcare vouchers, is widely available to working families — even for those with relatively high earnings.
How Much Funding Can You Get?
If eligible, you can get as much as £2,000 in free childcare funding for each child under 12, every year, or potentially twice that if they’re disabled and under 17.
How To Get Tax-Free Childcare
If eligible, you will need an online Childcare Account which you, or others on your behalf, deposit into. You’ll need to deposit 80% of the eligible childcare costs and the Government will top up the remaining 20%. The funds can then be drawn down by your childcare provider.
Eligibility Essentials
So long as working parents are earning at least £152 per week (lower if under 23), they can be earning up to £100,000 and still remain eligible for Tax-Free Childcare, even if their partner also earns up to that amount. You must not already be claiming certain benefits, a childcare bursary, nor Childcare Vouchers. Other caveats also apply.
More Information about Tax-Free Childcare is available here.
Free Childcare Hours for 2-Year-Olds:
.") Certain 2-year-olds are eligible for 15 hours of free childcare each week, through another Government scheme. This one is to help primarily those families on benefits.
Certain 2-year-olds are eligible for 15 hours of free childcare each week, through another Government scheme. This one is to help primarily those families on benefits.
How Much Funding Can You Get?
Eligible 2-year-olds can get 570 free childcare ‘hours’ per year. This is usually taken as 15 hours per week spread over 38 weeks of the year. However, some childcare settings allow a more flexible pattern. For example, they could be taken as less hours per week for more weeks of the year, or the reverse of that.
Eligibility Essentials
Rules around eligibility are strict and essentially require you (the parent/guardian) to be in receipt of certain Government benefits or the child to fall into an ‘additional needs’ category. Children can still be eligible, for example, if they are being cared for by the local authority, are subject to an Education, Health and Care (ECH) Plan, have left care under some types of order or are not citizens of the UK but fall into a certain category.
How To Get Free Childcare for 2-Year-Olds
Free childcare hours for 2-year-olds can be accessed via your local council or through your childcare provider. Let us know if that’s us and we’ll be happy to help you access the free childcare funding.
More Information is available here.
[UPDATE MARCH 2023: See our post about funding planned for children from the age of just 9 months following the Spring Budget 2023 here].
Free Childcare Hours for 3 & 4-Year-Olds:
 3 and 4-year-olds in England are very well catered for when it comes to free childcare funding. This is aimed to help them receive that all-important early years education and to help those parents wishing to return to the workplace.
How Much Funding Can You Get?
All children aged between 3 and 4 who live in England can get at least 15 hours of free childcare each week, possibly up to 30 hours in some circumstances. It’s a very generous Government scheme resulting in between 570 and 1140 free childcare hours, per child, per year. It’s usually taken over 38 weeks of the year but some childcare settings allow a more flexible spread.
Eligibility Essentials
All 3 and 4-year-olds living in England are eligible for the 15 hours scheme and it’s not means tested.
For the top-up to 30 hours per week, however, eligibility is affected by household income. You and your partner, if you have one, must earn at least £152 per week (lower if under 23) but less than £100,000 per annum. If eligible, though, you are usually also eligible for Tax-Free Childcare (or Childcare Vouchers) or childcare funding through Universal Credit. Other caveats also apply, but these are the main ones.
How To Get Free Childcare for 3 & 4-Year-Olds
The ‘15 hours’ scheme for 3 & 4-year-olds can be accessed via your local council or through your childcare provider. (Let us know if that’s us and we’ll be happy to help with your application). For the ‘30 hours’ scheme, apply here.
More Information about both schemes is available here.
[UPDATE MARCH 2023: See our post about funding planned for children from the age of just 9 months following the Spring Budget 2023 here].
Tax Credits for Childcare:
Eligibility Essentials
 Tax Credits specifically for childcare are only available to existing claimants under the scheme, through ‘Working Tax Credits’. New claimants should instead refer to the ‘Childcare Funding through Universal Credit’ section below.
How Much Funding Can You Get?
If you’re eligible, you can reclaim as much as 70% of eligible childcare costs — up to £122.50 per week if you have one child, or it’s £210 if you have more than one.
How To Get Tax Credits for Childcare
Existing claimants in receipt of Working Tax Credits for childcare receive the funding direct to their bank/building society account. This is effectively a repayment of the eligible childcare costs already incurred.
More Information is available here
Childcare Funding through Universal Credit:
How Much Funding Can You Get?
 For those who are eligible, this is quite a generous scheme that allows them to reclaim* as much as 85% of their childcare costs. The maximum available, however, is £646.35* each month for one child, or it’s £1108.04* for more than one.
* [UPDATE MARCH 2023: See our post about the increases and improvements to this scheme following the Spring Budget 2023 here].
Eligibility Essentials
You/your partner (if applicable) need to be working, claiming Universal Credit and claiming for a child under 17. Other caveats apply. Note that you cannot claim this funding if you’re already claiming for childcare funding through Tax Credits nor through the Tax-Free Childcare scheme. Your earnings and the amount of any savings and/or investments may also affect your claim.
How To Get Childcare Funding via Universal Credit
This scheme allows you to reclaim eligible childcare costs going back up to 3 months at any given point. So, you need to pay first and then claim eligible costs back within that time frame – otherwise you could miss out.
More Information is available here [and see our post about improvements to this scheme, including increased funding, following the Spring Budget 2023].
Childcare Funding Options for Students
Students are quite well supported in terms of childcare, with 3 key funding schemes that may help them with childcare costs.
The Student Childcare Grant:
 This is a grant that does not need to be repaid and is in addition to any undergraduate Student Finance.
How Much Funding Can You Get?
The Student Childcare Grant can cover up to 85% of childcare costs. The maximum covered is £183.75 per week for 1 child, or that’s £315.03 for more than one (academic year 22/23).
Eligibility Essentials
As well as having a dependent child under 15 (17 if they have special needs), students must live permanently in England and be studying full-time in higher education. They must be eligible for undergraduate student finance based upon their income, but not have a postgraduate loan. Other caveats also apply including that it’s not available if the student is already claiming other specific funding for their childcare.
How To Get a Student Childcare Grant
The Student Childcare Grant can be applied for in tandem with the Student Finance application and is accessed, if successful, through a Student Finance Account.
More Information is available here
The ‘Learner Support’ Scheme:
 Learner Support is a type of financial support designed for students who are suffering financial hardship. It can be used to fund childcare for eligible students who are also parents.
How Much Funding Can You Get?
How much financial assistance you receive for childcare under the Learner Support Scheme will depend very much upon your particular circumstances.
Eligibility Essentials
To be eligible for the childcare element of Learner Support, you must be a parent over 20 (otherwise it’s 19). You must be facing financial hardship while studying on a further education course (Level 3 or over).
How To Get ‘Learner Support’ for Childcare
Learner Support applications must be made through the education setting that’s running the course. The financial assistance you receive, if eligible, can take the form of a repayable loan, a free grant or, in the case of childcare, payment direct to an Ofsted-registered childcare provider.
More Information is available here
The ‘Care to Learn’ Scheme:
 Care to Learn may suit if you are a parent who is not yet 20 and are studying on a publicly-funded course, although see caveats below.
How Much Funding Can You Get?
If eligible, you could get £160 for childcare, per week, for each child. That figure increases to £175 if you’re living in London. It can cover registration and deposit fees for your child’s childcare and to retain your child’s place over summer holidays. The scheme can also be used to fund childcare taster days (up to 5) at the childcare provider setting, and cover associated travel to/from the setting.
Eligibility Essentials
You must live in England and be the main carer for the child you are claiming for. You should be under 20 when the course starts and it must be a publicly-funded one at certain types of education setting. A few examples include schools, some colleges and sixth form schools/colleges plus others. It must not be a higher education course at a university. Other caveats also apply.
How To Get ‘Care to Learn’ Childcare Funding
Apply for Care to Learn funding here.
More Information is available here
Outstanding Childcare in Clayton-le-Woods, Chorley

![]() Little Acorns Nursery supports all the Government childcare funding options for eligible families. Please do ask us if you need any help clarifying your childcare funding options or with your application — we’ll be happy to help. Little Acorns Nursery and pre-school provides an outstanding, award-winning childcare service in Clayton-le-Woods, Chorley, Central Lancashire (PR6). We’re also conveniently close for those in Clayton Brook, Clayton Green, Thorpe Green, Pippin Street, Buckshaw Village and Whittle-le-Woods. Farington, Bamber Bridge, Lostock Hall, Euxton, Leyland and Penwortham are also nearby.
Little Acorns Nursery supports all the Government childcare funding options for eligible families. Please do ask us if you need any help clarifying your childcare funding options or with your application — we’ll be happy to help. Little Acorns Nursery and pre-school provides an outstanding, award-winning childcare service in Clayton-le-Woods, Chorley, Central Lancashire (PR6). We’re also conveniently close for those in Clayton Brook, Clayton Green, Thorpe Green, Pippin Street, Buckshaw Village and Whittle-le-Woods. Farington, Bamber Bridge, Lostock Hall, Euxton, Leyland and Penwortham are also nearby.
To make an enquiry about a possible place for your child at Little Acorns Nursery, please get in touch:

 As promised in our recent
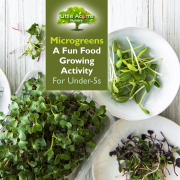
  Microgreens, also known as micro leaves, are the young shoots of growing plants that are edible. Examples include the seedlings of herbs like basil and coriander, red cabbage micro leaves and the shoots from root vegetables like beetroot. When growing, the seedlings form a thick and rich ‘carpet’ of shoots that, when ready, can be snipped off en masse and used in meals as salads or garnishes. What’s more, they’re delicious, highly nutritious and make meals look amazing. The entire activity can also be accomplished indoors in any home. You do not need to have a garden because a well-lit windowsill or counter top will more than suffice.
 Microgreen seeds. These are available inexpensively online or at places like garden centres and even some supermarkets. You can buy microgreen mixed seeds or choose seeds for rocket, beetroot, spinach, red cabbage, fennel, broccoli, radish or mustard. Each has a distinctive look, when growing, and flavour, when eaten. Read the packets for more detail or just have fun and experiment!
 Different microgreen seeds grow at different rates but usually a dense carpet of growing shoots and tiny leaves will cover the trays or pots within one or two weeks. Generally speaking, when you can see small, immature leaves at the top of shoots about 1 to 1¼ inches tall, they are about ready to be harvested. For young children in particular, snipping them off is best done by parents, to avoid injury. The carpet of microgreens can be snipped off, using scissors, low down near where the shoots begin. It’s best to snip them off rather than to pull them up by the roots because then they have the chance to regrow and give you/your child a second crop later on. The microgreens can then be washed in a fine colander, under a cold tap, to remove any remnants of soil.
 Your child can then continue the fun by helping with meal preparation (with adult supervision for safety). Microgreens make wonderful garnishes, are lovely in salads and sandwiches and can also be added to things like soup, risotto, pasta, baked potatoes and burgers. They are incredibly attractive to look at, jazzing up any meal and also giving children extra nutrients to consume. They are also a great way to encourage children to try new tastes and food textures.

 October sees one of the year’s biggest traditions in the form of Halloween, which arrives on the 31st. Halloween, which is short, in effect, for “All Hallows’ Eve”, has it’s historical roots in Christian and, many believe, Celtic, Gaelic and Pagan festivals. Broadly speaking, these festivals were events to remember the dead, including saints (a.k.a. “hallows”). However, for virtually all children these days, it’s simply a traditional time for some themed fun. And what fun it can be! Today we’ll therefore take a look at the activities and opportunities that Halloween has for little ones at this time of year.
 Halloween Costumes — Dressing Up Fun!
 Edward Scissor Hands is another favourite. Try taping teaspoons or kitchen foil to your little one’s fingers to simulate Edward’s hands — but only if they’re old enough to be able to control movements so they don’t hurt themselves or others.
 Halloween Parties
.") Parents and children can prepare for such parties, or when staying at home for the evening, with a range of Halloween-themed party food. This is also great fun and may even encourage little ones to eat foods they may not normally try (as appropriate for their age, of course). Try baking plain biscuits in Halloween themed shapes. Some can be made to look like pumpkins, bats and ghosts, for example, with suitable icing. Use whichever recipe is your favourite for the actual biscuits. Children will love the theming, which will make the food fun!
Parents and children can prepare for such parties, or when staying at home for the evening, with a range of Halloween-themed party food. This is also great fun and may even encourage little ones to eat foods they may not normally try (as appropriate for their age, of course). Try baking plain biscuits in Halloween themed shapes. Some can be made to look like pumpkins, bats and ghosts, for example, with suitable icing. Use whichever recipe is your favourite for the actual biscuits. Children will love the theming, which will make the food fun! Carved pumpkins are, of course, a great tradition for Halloween and one that children will love. For the safety of little ones, though, parents/adults will need to do the carving. Children can get involved in emptying out the pumpkin flesh and perhaps saving seeds, which they can later grow into new pumpkin plants for next year. They can also get involved in decorating outside of the carved pumpkins with paint or Sharpie pens. Red or green food dye can also be used to paint the inside. A good hand wash will be needed after all of this.
  A lit candle (or an LED equivalent) can be placed inside by the adult and this will shine through and illuminate the design or face. Then the finished pumpkin can be placed somewhere safe — where little ones cannot endanger themselves if a real flame is used — for example out in the garden or on the front drive.
 Pumpkin Picking Locally
 Another pumpkin farm that’s open to families is also in Leyland, again less than 4 miles away from Clayton, at Moss Lane, Farington Moss, Leyland PR26 6QD. To pick your own pumpkin there (weekends only in October), call 07701 082 482 or get
  Trick or treating is the Halloween tradition of knocking on neighbours’ doors, shouting “trick or treat?” and hoping that some sweets or similar will be handed over to children by kindly neighbours. That would be the ‘treat’ element. The ‘trick’ element is more rarely used today, especially with the younger children. However, it still occasionally involves funny tricks being played on those neighbours who didn’t offer sweets. This ‘trick’ element is to be used only with particularly friendly households, though, and perhaps only with those that have been forewarned by the parents involved. If not handled with care, it can backfire and cause terribly bad feeling or even be thought of as antisocial behaviour. For that reason, forewarning neighbourhoods about any group trick or treat sessions is wise, including agreeing a way for them to opt out if they prefer.
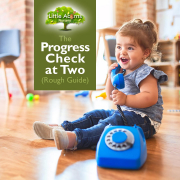

 Every 2-year-old attending registered childcare settings in England is subject to what’s known as a ‘Progress Check at 2’. Today we explain what it entails, who is involved and how it benefits little ones. Here’s our rough guide to the Progress Check at 2:
 curriculum are the core focus areas of the Progress Check at 2.") The three ‘prime’ areas of the Early Years Foundation Stage (EYFS) curriculum are also the core focus areas of the Progress Check at 2. Hence, the checks will look to see how well the child is progressing primarily in their:
The three ‘prime’ areas of the Early Years Foundation Stage (EYFS) curriculum are also the core focus areas of the Progress Check at 2. Hence, the checks will look to see how well the child is progressing primarily in their: The core idea behind the Progress Check at 2 is to discover whether progress is at expected levels for the child’s age and development.
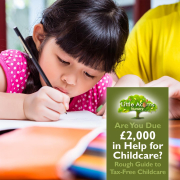

 Each year, around 1 million families miss out on thousands of pounds in free childcare funding — despite being eligible through the Government’s Tax-Free Childcare scheme. Are you one of them?
 Families, including single parent families, are usually eligible for tax-free childcare scheme if they meet the following criteria:
 The Tax-Free Childcare contribution from the Government can only be used to pay for childcare provided by approved childcare providers that have signed up to the scheme. Such providers must be registered with either the Early Years Register, the Childcare Register or Ofsted in order to be approved. However, they can be nurseries, childminders, nannies, play schemes or even after school clubs. Little Acorns Nursery is, of course, such an approved childcare provider and would be happy to assist families to make the most of this very useful, free childcare funding opportunity.


 “Exceptionally Effective Observation & Assessment” of Children

 Outstanding Personal Development, Behaviour & Welfare
 Are you looking for the best nurseries or pre-schools for your baby or child? Then consider