
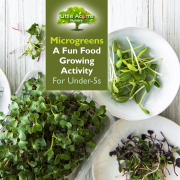

 As promised in our recent Educational Food Growing post for kids, we’ve got another wonderful food-growing activity for children today. Whether you have a toddler, preschooler or older child, they’ll love this activity and it also has a huge range of benefits. It is a fun, educational, easy and inexpensive activity that gives children an enormous feeling of achievement. It also results in the miraculous growth of delicious food that children and the whole household can eat! What’s not to love, therefore, about our growing microgreens activity! Today, we explain just how easy it is.
First: What Are Microgreens?
 Microgreens, also known as micro leaves, are the young shoots of growing plants that are edible. Examples include the seedlings of herbs like basil and coriander, red cabbage micro leaves and the shoots from root vegetables like beetroot. When growing, the seedlings form a thick and rich ‘carpet’ of shoots that, when ready, can be snipped off en masse and used in meals as salads or garnishes. What’s more, they’re delicious, highly nutritious and make meals look amazing. The entire activity can also be accomplished indoors in any home. You do not need to have a garden because a well-lit windowsill or counter top will more than suffice.
Growing Microgreens is a fun, educational, easy and inexpensive activity that gives children an enormous feeling of achievement. It also results in delicious food that children and the whole household can eat!
Additional Benefits of Children Growing Microgreens
Getting children directly involved in growing microgreens can also encourage them to try new foods, enjoy new flavours and to get much needed vitamins and minerals at the critical time when they are developing. Teaching them to grow food will also teach them a huge number of lessons, for example about nature, the circle of life, how to care for another living thing responsibly, where food comes from and even meal preparation, nutrition and balancing diets. Growing microgreens is a doorway to all of this and more, yet is so simple as an activity.

What You’ll Need to Start Growing Microgreens
You/your child will need a few things to get started in the growing activity:
 Microgreen seeds. These are available inexpensively online or at places like garden centres and even some supermarkets. You can buy microgreen mixed seeds or choose seeds for rocket, beetroot, spinach, red cabbage, fennel, broccoli, radish or mustard. Each has a distinctive look, when growing, and flavour, when eaten. Read the packets for more detail or just have fun and experiment!
- One or more shallow seed trays – also available inexpensively from garden centres or online. Alternatively, you can use any shallow tray left over from a ready meal, or use used yoghurt pots, egg cartons, cut down kitchen roll ‘cores’ or similar. Whatever you use will need to have drainage holes underneath, so parents will need to help any piercing, for safety purposes.
- As the main pots or tray require drainage holes, you will need another tray, cut-down pot or saucer to catch drips underneath. This is known as a drip tray and simply protects your surface from moisture.
- Lastly, you’ll need some light soil to sow the seeds in. This can be from the garden if you have one and are on a low budget (sieve first), or buy peat-free compost. Multi-purpose compost or a compost specifically for seeds and cuttings will be perfect. If you’re on a really low budget, another alternative is to simply sow microgreens directly onto layers of dampened tissue paper e.g. horizontal sheets torn from a kitchen towel.
 Microgreen seeds. These are available inexpensively online or at places like garden centres and even some supermarkets. You can buy microgreen mixed seeds or choose seeds for rocket, beetroot, spinach, red cabbage, fennel, broccoli, radish or mustard. Each has a distinctive look, when growing, and flavour, when eaten. Read the packets for more detail or just have fun and experiment!
That’s all you and your little one need, apart from water, natural light and some care and patience.
What to Do
Once you’ve got the above items together, your child can take the following steps:
| Step 1: Fill the seed tray, pots or cartons almost to the top with compost or whatever is being used as ‘soil’ (see the tissue option above if the budget is low). |
| Step 2: If using soil or compost, this needs to be tamped down gently to flatten and level the surface. |
| Step 3: The microgreen seeds can now be sprinkled lightly and evenly (best done from a little bit of a height), or manually spaced if your child enjoys that alternative approach. Clumping should be avoided. |
| Step 4: A light sprinkling of additional compost (or sieved soil) can then go on top to keep seeds in place. It may be best to do this outdoors. |
| Step 5: An additional layer of kitchen towel or tissue can be placed on top of the seeds, but only until the seeds start to germinate later on. |
| Step 6: Lightly sprinkle water or spray the seeds gently with a water spray, taking care not to disturb or wash away the seeds. |
| Step 7: Place the trays or pots, with their drip trays underneath, onto a well-lit windowsill or counter top. A little ventilation will also not be a bad thing for the seeds. |
| Step 8: Your child will need to check that the seeds/soil/tissue are damp each day and watered lightly to ensure they don’t dry out. Watering can either be done from above (ideally using a mister or water spray so as to not disturb the seeds) or from below by simply pouring water into the drip trays. This will be slowly drawn up into the soil naturally, particularly if it’s not too deep. |
| Step 9: As soon as shoots begin to appear, your child should remove any covering (from Step 5), taking care not to disturb the seedlings, and continue to water lightly each day as the seedlings grow. |
TIP: Don’t forget to get your child to wash their hands after touching soil and seeds etc.
Harvest Time!
 Different microgreen seeds grow at different rates but usually a dense carpet of growing shoots and tiny leaves will cover the trays or pots within one or two weeks. Generally speaking, when you can see small, immature leaves at the top of shoots about 1 to 1¼ inches tall, they are about ready to be harvested. For young children in particular, snipping them off is best done by parents, to avoid injury. The carpet of microgreens can be snipped off, using scissors, low down near where the shoots begin. It’s best to snip them off rather than to pull them up by the roots because then they have the chance to regrow and give you/your child a second crop later on. The microgreens can then be washed in a fine colander, under a cold tap, to remove any remnants of soil.
And Eat!
 Your child can then continue the fun by helping with meal preparation (with adult supervision for safety). Microgreens make wonderful garnishes, are lovely in salads and sandwiches and can also be added to things like soup, risotto, pasta, baked potatoes and burgers. They are incredibly attractive to look at, jazzing up any meal and also giving children extra nutrients to consume. They are also a great way to encourage children to try new tastes and food textures.
By growing microgreens themselves, children will have had great fun and will have learned so much along the way. It’s a fabulous and educational activity, any time of year!
A Place for your Child at our Outstanding Nursery & Pre-School in Clayton-le-Woods, Chorley

![]()
Are you searching for outstanding nurseries or pre-schools in Clayton-le-Woods (PR6), Chorley, or near to Clayton Green and Clayton Brook in Central Lancashire?
Little Acorns is in Clayton-le-Woods and is rated by Ofsted as an outstanding nursery. It is also an award-winning nursery, having won an important National award. Our childcare service is simply unrivalled in the area. So, if you’d like your child to experience the very best childcare, register for a nursery place at Little Acorns Nursery. You can also request a guided tour or ask any questions using the buttons below. We look forward to hearing from you.


 October sees one of the year’s biggest traditions in the form of Halloween, which arrives on the 31st. Halloween, which is short, in effect, for “All Hallows’ Eve”, has it’s historical roots in Christian and, many believe, Celtic, Gaelic and Pagan festivals. Broadly speaking, these festivals were events to remember the dead, including saints (a.k.a. “hallows”). However, for virtually all children these days, it’s simply a traditional time for some themed fun. And what fun it can be! Today we’ll therefore take a look at the activities and opportunities that Halloween has for little ones at this time of year.
 Halloween Costumes — Dressing Up Fun!
 Edward Scissor Hands is another favourite. Try taping teaspoons or kitchen foil to your little one’s fingers to simulate Edward’s hands — but only if they’re old enough to be able to control movements so they don’t hurt themselves or others.
 Halloween Parties
.") Parents and children can prepare for such parties, or when staying at home for the evening, with a range of Halloween-themed party food. This is also great fun and may even encourage little ones to eat foods they may not normally try (as appropriate for their age, of course). Try baking plain biscuits in Halloween themed shapes. Some can be made to look like pumpkins, bats and ghosts, for example, with suitable icing. Use whichever recipe is your favourite for the actual biscuits. Children will love the theming, which will make the food fun!
Parents and children can prepare for such parties, or when staying at home for the evening, with a range of Halloween-themed party food. This is also great fun and may even encourage little ones to eat foods they may not normally try (as appropriate for their age, of course). Try baking plain biscuits in Halloween themed shapes. Some can be made to look like pumpkins, bats and ghosts, for example, with suitable icing. Use whichever recipe is your favourite for the actual biscuits. Children will love the theming, which will make the food fun! Carved pumpkins are, of course, a great tradition for Halloween and one that children will love. For the safety of little ones, though, parents/adults will need to do the carving. Children can get involved in emptying out the pumpkin flesh and perhaps saving seeds, which they can later grow into new pumpkin plants for next year. They can also get involved in decorating outside of the carved pumpkins with paint or Sharpie pens. Red or green food dye can also be used to paint the inside. A good hand wash will be needed after all of this.
  A lit candle (or an LED equivalent) can be placed inside by the adult and this will shine through and illuminate the design or face. Then the finished pumpkin can be placed somewhere safe — where little ones cannot endanger themselves if a real flame is used — for example out in the garden or on the front drive.
 Pumpkin Picking Locally
 Another pumpkin farm that’s open to families is also in Leyland, again less than 4 miles away from Clayton, at Moss Lane, Farington Moss, Leyland PR26 6QD. To pick your own pumpkin there (weekends only in October), call 07701 082 482 or get
  Trick or treating is the Halloween tradition of knocking on neighbours’ doors, shouting “trick or treat?” and hoping that some sweets or similar will be handed over to children by kindly neighbours. That would be the ‘treat’ element. The ‘trick’ element is more rarely used today, especially with the younger children. However, it still occasionally involves funny tricks being played on those neighbours who didn’t offer sweets. This ‘trick’ element is to be used only with particularly friendly households, though, and perhaps only with those that have been forewarned by the parents involved. If not handled with care, it can backfire and cause terribly bad feeling or even be thought of as antisocial behaviour. For that reason, forewarning neighbourhoods about any group trick or treat sessions is wise, including agreeing a way for them to opt out if they prefer.
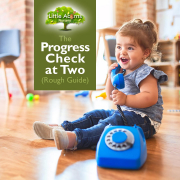

 Every 2-year-old attending registered childcare settings in England is subject to what’s known as a ‘Progress Check at 2’. Today we explain what it entails, who is involved and how it benefits little ones. Here’s our rough guide to the Progress Check at 2:
 The Progress Check at 2 should not be confused with the Healthy Child Programme’s 2-Year Review that 2-year-olds also undergo around the same age. While the ‘Progress Check at 2’ looks at the child’s learning and development progress and is the topic of today’s guide, the separate ‘2 Year Review’ is more about the child’s health and wellbeing and is undertaken by healthcare professionals like health visitors. They will look at things like overall health, immunisation uptake, physical and mental health and development, overall wellbeing and support levels from parents, carers or guardians.
 curriculum are the core focus areas of the Progress Check at 2.") The three ‘prime’ areas of the Early Years Foundation Stage (EYFS) curriculum are also the core focus areas of the Progress Check at 2. Hence, the checks will look to see how well the child is progressing primarily in their:
The three ‘prime’ areas of the Early Years Foundation Stage (EYFS) curriculum are also the core focus areas of the Progress Check at 2. Hence, the checks will look to see how well the child is progressing primarily in their: The core idea behind the Progress Check at 2 is to discover whether progress is at expected levels for the child’s age and development.
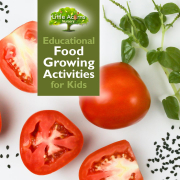

 and that’s just one of many reasons why little ones should be encouraged to learn about sowing seeds and growing their own plants. Today, we’re taking that a step further by explaining how children can grow plants that will give them real, edible food! With a little planning, care and effort, children can grow herbs, vegetables and even fruit if they put their minds to it. What’s more, it’s possible without a garden and needn’t cost a penny!
 That will never be more evident than when a seed has grown into a plant that bears fruit, which contains more seeds, through which the whole process can start again.
 Seeds for herbs, vegetables and microgreens are all widely retailed in places like garden centres and even some supermarkets. Each seed packet will usually explain when and how seeds can be planted. This is perhaps the most obvious way for children to grow plants that, if all goes well, result in a healthy crop of food. However, we can be far more adventurous than that! Where is the fun in buying seeds in packets when children can get them for free? Let’s take a look at some cheaper and far more creative ways that children can start things off.
 “Free” you say? Well, pretty much! Next time you have some shop-bought tomatoes and/or peppers as part of your ordinary shopping, get your little one to take a few moments to save some of the seeds. These are found within things like tomatoes, before they’re eaten, and are usually discarded in the case of peppers. Such seeds can simply be spaced out on some compost or earth, watered in and a thin layer of soil or compost added on top. If these are left on the windowsill and the earth kept moist by the child over the coming days, little seedlings will soon start to appear.
  The image of the green plant shows our pepper seedling grown in this exact way — and it was incredibly easy to achieve. Ours is about 3 or 4 weeks old and it’s just about ready to be “planted out” outdoors, to mature. Once mature, they should flower then sprout some new peppers! It’s identical for tomatoes. If children have no garden for larger plants to be transferred to, ‘grow bags’ or any kind of suitable container can be used on a patio or balcony. Children will need to keep watering them every day, to keep the soil moist. Flowers will eventually appear and, with a little help from bees and insects, will be pollinated so that they eventually ‘fruit’. If appropriate care and attention continues, your child will eventually end up with vegetables that can eventually ripen and be eaten. That’s free tomatoes and peppers for the family, in our examples. Don’t forget to remind your child to save a few more seeds, though, so they can repeat the whole process again … and again!
 Does your little one know that he/she can grow new herb plants totally free of charge? This is done simply by clipping cuttings from your usual shop-bought herbs and leaving them in water to root. It’s incredibly easy so long as the child has some patience (that’s another useful lesson for them). All the child needs to do is to save some small (3 or 4 inch long) cuttings from the tips of herbs like basil or coriander. For safety, parents/carers may need to help with the cutting part if the children are very young.
  The bottom sections of the clipped cuttings should be dangled into a glass, small bottle or other suitable vessel of water and left over a period of days until they sprout roots. See the photo for an example. A clear water vessel, e.g. drinking glass, will allow your child to clearly see the roots. Once suitably long, these new little plants can be transplanted individually into compost/soil in something like flower pots — or indeed a free, recycled alternative like a yoghurt pot. The little ones will need to continue attending to the plants with regular watering so that the herbs grow and mature. This activity can all be done indoors on a windowsill too, so requires minimal space. Growing their own herbs may even make children more inclined to eat them!
 Another ridiculously easy way to grow food is to “re-grow” it. A classic example of this is to save the root section from a salad vegetable like iceberg lettuce or celery. This is the part of a shop-bought vegetable that would normally be cut off and discarded. However, in what has to be the easiest food growing activity of all, the child simply needs to keep that root section and leave it root down in water for 1 to 3 weeks. It will eventually grow some roots but, before that, the upper tip will start to sprout new leaves. In our own test using an iceberg lettuce we ended up with loads! That is new, free salad that can be later harvested and eaten. Simple!
 (Speaking of iceberg lettuces): Excuse the pun, but the ideas above are just the tip of the iceberg! There are so many other types of vegetable and fruit that children can grow (or re-grow) for next to nothing. For example, they can grow new apple trees from apple pips and new strawberry plants from the outside skin of strawberries. And the whole topic of

 Each year, around 1 million families miss out on thousands of pounds in free childcare funding — despite being eligible through the Government’s Tax-Free Childcare scheme. Are you one of them?
 Families, including single parent families, are usually eligible for tax-free childcare scheme if they meet the following criteria:
 The Tax-Free Childcare contribution from the Government can only be used to pay for childcare provided by approved childcare providers that have signed up to the scheme. Such providers must be registered with either the Early Years Register, the Childcare Register or Ofsted in order to be approved. However, they can be nurseries, childminders, nannies, play schemes or even after school clubs. Little Acorns Nursery is, of course, such an approved childcare provider and would be happy to assist families to make the most of this very useful, free childcare funding opportunity.

 If you are looking for the very best childcare provision for your child in Central Lancashire, there are a multitude of reasons why you should choose Little Acorns Nursery. Put simply, Little Acorns offers the very best possible childcare service for under-fives — but you don’t need to take our word for it. This is independently verified, as you’ll see below. Take a look at our top 20 reasons to choose Little Acorns Nursery and you’ll soon see why it’s virtually impossible to beat when it comes to outstanding childcare provision.
 The quality of teaching, learning and assessment at the nursery was also found to be simply outstanding when Ofsted appraised us. It doesn’t get any better than that.
 Little Acorns Nursery has received a number of awards for it’s healthy eating policy. These include a Recipe 4 Health Award and accreditation via the Smiling For Life Award. Each recognises the healthy meals and snacks that we provide to children under our care.
 It almost goes without saying that, of course, Little Acorns Nursery has a 5-star food hygiene rating. Once again, that’s the topmost rating. Quality and professionalism are, after all, at the heart of everything we do.
 Everything we do at the nursery has a purpose, whether it’s a customised approach to learning for a specific child, the choice of a particular activity or game for another, the purchase of a piece of new equipment, or the way we keep parents informed about their child’s progress each day — there is a reason for everything we do. Ultimately, our goal is to give every child the very best start in life and to equip them to achieve their personal best in every area. In this way, they are given the tools to achieve the very best outcomes in their lives.
 Our Forest School should be open from Autumn 2022. Children love Forest School and it teaches them so much about nature, the natural world and ultimately about themselves.

 Last year, we wrote a detailed post outlining
  Interestingly, under-five children who came from disadvantaged backgrounds were shown to benefit even more than those who didn’t. For this reason, reading with parents/carers has been proposed as a possible way to close the performance deficit often seen with children from such backgrounds. It may well represent a perfect solution to even up the playing field.
 Deeper bonds with parents/carers (after all, this is quality time spent together, one-to-one);


 1. Bird spotting
 ee & Butterfly Spotting
 3. Search for Animal Tracks
 4. Make a Den
 5. Float a Boat
 6. Go on a Ramble
 7. Get into Photography
 8. Obstacle Course
 9. Have a Picnic
 11. Hunt for Mini Beasts
 12. Get Creative with Rocks & Stones
 Whether on the beach or in the garden, it’s surprising how creative children can be with stones and rocks! Stones can be painted with lovely patterns or images, perhaps combined with simple words or as part of a ‘stone story’. Bigger rocks can be piled one on top of the other to form sculptures — these look magical. Children will love these and other creative activities that they can take part in outdoors, with simple stones and rocks.

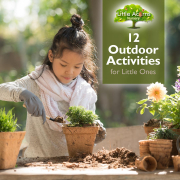
 In today’s post, we take a look at the importance of outdoor play for children in their early years. Indeed, there are many benefits, as we’ll see …
 Playing outside is also a healthy release from things like TV, electronic screens and, potentially, from an otherwise more sedentary lifestyle. Away from the confines of the indoors, outdoor play allows children the freedom to move about more freely. Outside, they’ll learn to navigate spaces, obstacles and play equipment, all the time improving spatial awareness, coordination, balance and gross motor skills. These include running, jumping, climbing and so on. Their fitness levels will naturally improve too, as they build stamina, muscle and strength. This is all incredibly good for them.
 At Little Acorns, we understand the importance of outdoor play. Little ones, from the age of two have access to our outdoor gardens and play areas — all under close supervision, of course. We have invested heavily in a whole range of exciting, stimulating and educational outdoor facilities for the children to explore, play with and learn from. As they do, they will not only learn but they’ll also hone fine and gross motor skills, improve coordination and balance, improve physical fitness, enhance social skills and build friendships. They will also soon become better at recognising and balancing risk, they’ll become more independent as they move around freely. They’ll also learn from mistakes. Their self-confidence and self-esteem will also naturally grow. These are all incredibly important skills that will stand them in good stead as they gradually approach the age where they’ll leave us to move on to school.
 Taking outdoor experiences for little ones even further, Little Acorns regularly takes children on outings, including to local parks. More importantly, though, it was one of the first nurseries/pre-schools to introduce Forest School to Central Lancashire. This is the ultimate outdoor experience for under-fives and teaches them so much about the natural world — and also about themselves. As well as learning a huge amount about nature, flora, fauna, the seasons and about playing and learning in the Great Outdoors, Forest School helps them learn additional skills like problem-solving, working in teams, leadership, resilience, empathy, caring for the environment, personal responsibility and so much more. Learn more in
  framework, including Physical Development.") All these outdoor activities also support the early years curriculum. Outdoor playing and learning covers many of the areas outlined in the Early Years Foundation Stage (‘EYFS’) learning and development framework, which is prescribed for all childcare settings in England. Specifically, outdoor play helps children in at least four of the seven key areas of the EYFS including:
All these outdoor activities also support the early years curriculum. Outdoor playing and learning covers many of the areas outlined in the Early Years Foundation Stage (‘EYFS’) learning and development framework, which is prescribed for all childcare settings in England. Specifically, outdoor play helps children in at least four of the seven key areas of the EYFS including: