

 Having previously published guides and useful information here for parents, we thought it was time for a news round-up to highlight some of the wonderful activities that have been taking place with children at Little Acorns Nursery. Both children and staff have been extremely busy indeed, with exciting new initiatives, outings, special visits and extra-curricular activities. Let’s take a look at some of the most recent.
Forest School Sessions to Start the Year
 January began the new term with exciting Forest School sessions for our little ones. As well as trips to local countryside, woodland and natural open spaces, the pre-school children and ‘Rising 3s’ at Little Acorns learnt all about fire safety and its importance. (Take a look at the small photographs to see the various activities — click any for a larger view).
The children also enjoyed making some much-needed bird feeders for the local birds, many of whom struggle for food during the winter months. This coincided nicely with the RSPB’s Big Garden Birdwatch, which happens during the last week of January each year. During the annual event, both children and adults are asked to spend one hour outdoors to count up how many birds they see and which species they belong to.  This is important for bird conservation, bearing in mind that the UK bird population has fallen by a staggering 38 million birds in only 50 years. Sadly, even some birds that may have been thought of as common are now in trouble — the starling, for example, is now on the RSPB’s ‘Red List’ — their list of birds whose populations have declined to worrying levels. Such birds need all the help they can get from us, so it’s good for children to be aware of the importance of conservation and caring for wild creatures.
“Not all classrooms have four walls.”
 Forest School gives children access to the Great Outdoors so that they can learn all about nature and the natural environment — and also about themselves. As well as being educational and fun, spending time outdoors with nature has many benefits for children and some of these were previously explored here on the blog. Amongst other things, it teaches them new skills and even some they probably didn’t know they had — leadership, teamwork, critical thinking and problem-solving skills, for example. Learn more about Forest School in our comprehensive guide here.
Extra-Curricular Activities & New Skills
 Babies and under-five children at Little Acorns Nursery are fortunate to have access to some fun, exciting and educational activities. These are optional but are very popular amongst the little ones. As well as the day-to-day activities and curriculum at the nursery, we also offer:
 Preschool Drama Sessions, where children get to act, role-play and entertain each other in fun and beneficial ways.
Baby Farm Animals Visit the Children
 During January, the children were delighted when they had a surprise meeting with 2 wonderful twelve-week-old baby cows, called Louise and Jenny. Both calves and children were intrigued to meet each other and it was an opportunity that many children may otherwise not have had access to. Special thanks go to one of our lovely parents, who kindly facilitated this magical event with the loan of their beautiful calves.
Weekly Visits to the Library
 One of Little Acorns Nursery’s regular features is our weekly visits to the local library with the children. There, they are able to independently look through their favourite books as well as discovering new ones. Encouraging a love of reading is hugely important as it’ll lead to an understanding of a wider range of topics, it will improve language skills, enhance cognitive development and teach them so much about — well — potentially everything!
The Children Visit a Local Care Home
 Children also enjoy their monthly visit to the local care home. It’s a great opportunity to meet and interact with the care home residents, who also really appreciate the youngsters’ company. Children and adults will bond as they talk, sing and even share in craft activities together. It’s a wonderful experience for all parties, teaching children many lessons about life and the importance of community, as well as enhancing communication and social skills. It also really brightens the day for the care home residents.
Gruffalo Crumble in Storytelling Week
 As January became early February, toddlers at Little Acorns Nursery had great fun celebrating Storytelling Week in creative ways. Running between 30th January to 5th February, the event saw children doing things like making their own ‘Gruffalo Crumble’ and ‘Gruffalo Woods’ as well as playing in our ‘Blue River’. The accompanying photo (right) illustrates one of the many creative story-themed activities that the children enjoyed.
Vegetable & Fruit Growing at the Nursery
 By mid-February, staff and children at the nursery had begun to prepare for another nature-themed activity – the growing of our own vegetables and fruit! So, various seed packets were procured and preparation for sowing the seeds and eventually growing our own produce commenced. The plan is to incorporate this activity into daily nursery life. Children will thereby start to understand the importance of nurturing living plants and the benefits of growing their own food. They’ll learn to be responsible, they’ll learn new things about nature, where food comes from and the importance of tending their own vegetable patch at the nursery. It’s a thoroughly worthwhile and fulfilling activity for them to enjoy too.
We were also delighted when one kind grandmother noticed our Facebook post about this food growing activity and offered us some spare strawberry plants. A huge thanks to her for those and we’re now looking forward to a crop of delicious strawberries too!
An Outstanding Childcare Service & Forest School in Clayton-le-Woods, Chorley

![]() If you have a child under five and are looking for the best childcare in Lancashire, explore the opportunity of sending your baby, toddler or preschooler to our outstanding nursery and pre-school. Please get in touch to register your child for a nursery or pre-school place, request a guided tour of the setting or simply to ask any questions. Our staff are always happy to answer queries and to show families around this wonderful childcare setting. Please choose a button to get started:
If you have a child under five and are looking for the best childcare in Lancashire, explore the opportunity of sending your baby, toddler or preschooler to our outstanding nursery and pre-school. Please get in touch to register your child for a nursery or pre-school place, request a guided tour of the setting or simply to ask any questions. Our staff are always happy to answer queries and to show families around this wonderful childcare setting. Please choose a button to get started:
Little Acorns Nursery offers award-winning childcare in Central Lancashire. We are a nursery and pre-school located in Clayton-le-Woods, Chorley, also being convenient for families in Clayton Brook, Clayton Green, Thorpe Green, Pippin Street, Buckshaw Village, Whittle-le-Woods, Farington, Bamber Bridge, Lostock Hall, Euxton, Leyland and Penwortham.

 As promised in our recent
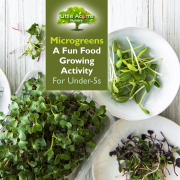
  Microgreens, also known as micro leaves, are the young shoots of growing plants that are edible. Examples include the seedlings of herbs like basil and coriander, red cabbage micro leaves and the shoots from root vegetables like beetroot. When growing, the seedlings form a thick and rich ‘carpet’ of shoots that, when ready, can be snipped off en masse and used in meals as salads or garnishes. What’s more, they’re delicious, highly nutritious and make meals look amazing. The entire activity can also be accomplished indoors in any home. You do not need to have a garden because a well-lit windowsill or counter top will more than suffice.
 Microgreen seeds. These are available inexpensively online or at places like garden centres and even some supermarkets. You can buy microgreen mixed seeds or choose seeds for rocket, beetroot, spinach, red cabbage, fennel, broccoli, radish or mustard. Each has a distinctive look, when growing, and flavour, when eaten. Read the packets for more detail or just have fun and experiment!
 Different microgreen seeds grow at different rates but usually a dense carpet of growing shoots and tiny leaves will cover the trays or pots within one or two weeks. Generally speaking, when you can see small, immature leaves at the top of shoots about 1 to 1¼ inches tall, they are about ready to be harvested. For young children in particular, snipping them off is best done by parents, to avoid injury. The carpet of microgreens can be snipped off, using scissors, low down near where the shoots begin. It’s best to snip them off rather than to pull them up by the roots because then they have the chance to regrow and give you/your child a second crop later on. The microgreens can then be washed in a fine colander, under a cold tap, to remove any remnants of soil.
 Your child can then continue the fun by helping with meal preparation (with adult supervision for safety). Microgreens make wonderful garnishes, are lovely in salads and sandwiches and can also be added to things like soup, risotto, pasta, baked potatoes and burgers. They are incredibly attractive to look at, jazzing up any meal and also giving children extra nutrients to consume. They are also a great way to encourage children to try new tastes and food textures.
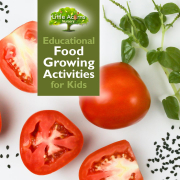

 and that’s just one of many reasons why little ones should be encouraged to learn about sowing seeds and growing their own plants. Today, we’re taking that a step further by explaining how children can grow plants that will give them real, edible food! With a little planning, care and effort, children can grow herbs, vegetables and even fruit if they put their minds to it. What’s more, it’s possible without a garden and needn’t cost a penny!
 That will never be more evident than when a seed has grown into a plant that bears fruit, which contains more seeds, through which the whole process can start again.
 Seeds for herbs, vegetables and microgreens are all widely retailed in places like garden centres and even some supermarkets. Each seed packet will usually explain when and how seeds can be planted. This is perhaps the most obvious way for children to grow plants that, if all goes well, result in a healthy crop of food. However, we can be far more adventurous than that! Where is the fun in buying seeds in packets when children can get them for free? Let’s take a look at some cheaper and far more creative ways that children can start things off.
 “Free” you say? Well, pretty much! Next time you have some shop-bought tomatoes and/or peppers as part of your ordinary shopping, get your little one to take a few moments to save some of the seeds. These are found within things like tomatoes, before they’re eaten, and are usually discarded in the case of peppers. Such seeds can simply be spaced out on some compost or earth, watered in and a thin layer of soil or compost added on top. If these are left on the windowsill and the earth kept moist by the child over the coming days, little seedlings will soon start to appear.
  The image of the green plant shows our pepper seedling grown in this exact way — and it was incredibly easy to achieve. Ours is about 3 or 4 weeks old and it’s just about ready to be “planted out” outdoors, to mature. Once mature, they should flower then sprout some new peppers! It’s identical for tomatoes. If children have no garden for larger plants to be transferred to, ‘grow bags’ or any kind of suitable container can be used on a patio or balcony. Children will need to keep watering them every day, to keep the soil moist. Flowers will eventually appear and, with a little help from bees and insects, will be pollinated so that they eventually ‘fruit’. If appropriate care and attention continues, your child will eventually end up with vegetables that can eventually ripen and be eaten. That’s free tomatoes and peppers for the family, in our examples. Don’t forget to remind your child to save a few more seeds, though, so they can repeat the whole process again … and again!
 Does your little one know that he/she can grow new herb plants totally free of charge? This is done simply by clipping cuttings from your usual shop-bought herbs and leaving them in water to root. It’s incredibly easy so long as the child has some patience (that’s another useful lesson for them). All the child needs to do is to save some small (3 or 4 inch long) cuttings from the tips of herbs like basil or coriander. For safety, parents/carers may need to help with the cutting part if the children are very young.
  The bottom sections of the clipped cuttings should be dangled into a glass, small bottle or other suitable vessel of water and left over a period of days until they sprout roots. See the photo for an example. A clear water vessel, e.g. drinking glass, will allow your child to clearly see the roots. Once suitably long, these new little plants can be transplanted individually into compost/soil in something like flower pots — or indeed a free, recycled alternative like a yoghurt pot. The little ones will need to continue attending to the plants with regular watering so that the herbs grow and mature. This activity can all be done indoors on a windowsill too, so requires minimal space. Growing their own herbs may even make children more inclined to eat them!
 Another ridiculously easy way to grow food is to “re-grow” it. A classic example of this is to save the root section from a salad vegetable like iceberg lettuce or celery. This is the part of a shop-bought vegetable that would normally be cut off and discarded. However, in what has to be the easiest food growing activity of all, the child simply needs to keep that root section and leave it root down in water for 1 to 3 weeks. It will eventually grow some roots but, before that, the upper tip will start to sprout new leaves. In our own test using an iceberg lettuce we ended up with loads! That is new, free salad that can be later harvested and eaten. Simple!
 (Speaking of iceberg lettuces): Excuse the pun, but the ideas above are just the tip of the iceberg! There are so many other types of vegetable and fruit that children can grow (or re-grow) for next to nothing. For example, they can grow new apple trees from apple pips and new strawberry plants from the outside skin of strawberries. And the whole topic of