— Creative Fun With Foraged Leaves
 Today we follow up last month’s leaves scavenger hunt and explore some wonderful creative activities that children can undertake using leaves they have foraged. It’s great timing too, with Autumn having arrived during September. While last month’s article focused on scavenging and learning to recognise different leaves, today’s activity highlights how children can use some of those leaves to get creative and use their imaginations. Such activities combine aspects of Forest School with art, design, and mark-making, so they will be fun, educational, and help children develop various skills. This is also a great way to bring the results of an outdoor, nature-based activity indoors. And, with featured activities including leaf pressing, leaf rubbing, collage, painting, and more, what’s not to love!
Let’s get creative with leaves in the first of our suggested activities for children: leaf printing.
Printing With Leaves
| What’s needed: children will need some leaves with attractive shapes and well-defined structures (e.g. sycamore, oak, maple/acer, beech), some paper, a medium-sized paintbrush, and coloured poster paints. A little hand roller will also help, if available. |
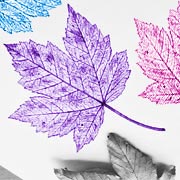 What to do: Printing with leaves is simple, quick, fun, and effective. All children need to do is paint the most textured side of each leaf and then, while the paint is still wet, turn the leaf over, lay it carefully on a paper sheet, and press all areas of it against the paper. That’s where the little hand roller may be useful, if available, otherwise it can be achieved by hand or by dabbing a wad of tissues or fabric against the back of the leaf. Then, carefully peel off the leaf to reveal an intricate leaf print. It’s almost like magic, and the results are often fabulous! Children can experiment with multiple leaf prints, different colours, various leaf shapes and sizes, and generate different designs. Encourage them to experiment to get their creative juices flowing.
Leaf Pressing
| What’s needed: To press leaves, children will need a selection of attractive leaves and something to press the leaves between, e.g. sheets of paper, newsprint, or indeed the pages or a large notepad or book. One or two books will also be useful as weights, although any other reasonably weighty object that has a flat underside will do. |
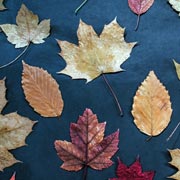 What to do: Place each leaf, or indeed small flowers, individually between the sheets of paper. Loose newsprint or paper sheets can work, but perhaps the easiest way is to use a large notepad or book; these lend themselves to multiple leaves being pressed at the same time via the double-page spreads within. Lay the closed book (or pile of sheets) on a table and place a flat weighted object on top (an adult may need to supervise young children for this part). Such an object can be anything that’s reasonably weighty and has a flat underside — books are a natural contender for such a purpose. After a few days or a week, your child can check to see if the leaves have dried and flattened. If not, they should check again a few days later. Once flat and dry, your child’s leaves are ready! They are now in a long-lasting state, so make wonderful mementos like bookmarks, and indeed can be used as the key elements for our next activity suggestion below.
Make a Collage with Leaves
| What’s needed: Your child will need some sheets of paper, some child-safe glue, and some leaves. The leaves can be freshly-foraged, although dried and pressed ones are also an excellent choice and may glue more efficiently. |
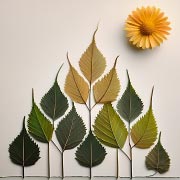 What to do: The challenge with this activity is for the child to make a nice design on the paper using leaves. So, they could be arranged in an attractive pattern, or as a picture to depict a scene or object. Each leaf simply needs to be glued carefully in place. Designs can also be augmented with extra details using things like twigs, flowers (dried or pressed ones will last longer), leaf stalks, or even extras like lichen or moss. The only limits are the child’s creativity and imagination. Check out some of the examples on this page for inspiration — and get started.
Painted Leaves
| What’s needed: Children will need some reasonably flat leaves, some coloured poster paints, and some paper. |
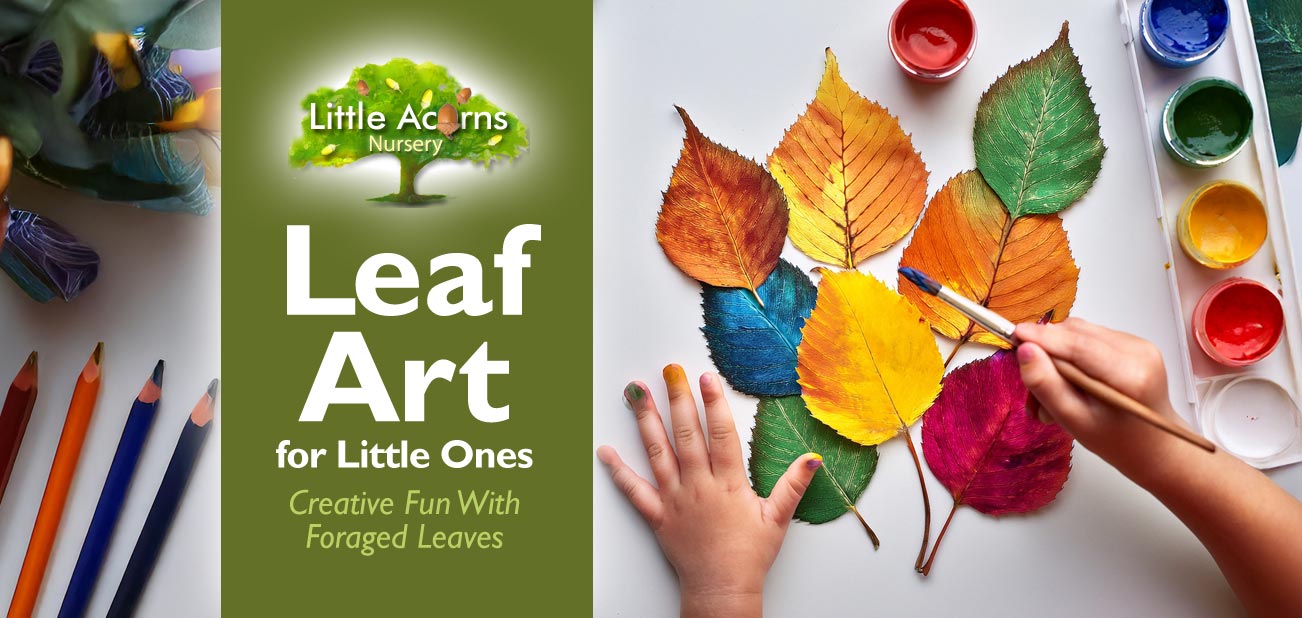
 What to do: This is an easy but effective activity where children simply paint one side of each leaf with coloured paint. Once painted, they look very attractive as art objects but can also be used, once the paint is dry, as part of a picture, display, or collage. This activity is a great opportunity for children to experiment with mixing colours, making new ones, and learning how to choose colours that either contrast or complement one another. Children will soon discover that whichever colour palette is chosen can give the final result a specific mood and feel, whether happy and sunny or muted and cool, for example, depending on the colour combinations.
The Magic of Leaf Rubbings
| What’s needed: This activity requires one or more leaves that have a well-defined structure, ideally with raised ‘veins’ and well-defined surface textures. Children will also need some sheets of thin paper plus either soft pencils, wax crayons, charcoal sticks, or oil pastels. |
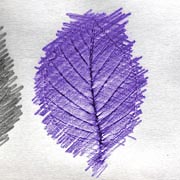 What to do: Working on a flat surface like a table or desk, children should lay a leaf, with its most textured side uppermost, under a sheet of the thin paper. Then, bearing in mind the location of the leaf under the sheet, the child should shade from side to side repeatedly over the top to reveal the texture and structure of the underlying leaf. A soft pencil will give better results than a hard one, and using the side of the drawing tip rather than the point will also be easier. Even better is using the side of a stick of charcoal, wax crayon, or oil pastel, as more area can be covered in each single stroke. A variety of colours will help enrich the results, but black and white results are also highly effective. Children can experiment with different media in this way, try using different pressures, different colours, and differently shaped leaves. This task is a particularly good way for children to hone mark-making and fine motor skills.
Draw (or Paint) a Leaf
| What’s needed: Children will need one or more leaves as visual reference (the more attractive the better), and some paints or coloured pencils. |
 What to do: The idea of this activity is simply for children to try to draw or paint their own representation of one or more leaves. They can position the leaves somewhere close, like on their desk or table, and see if they can draw them accurately on a sheet of cartridge or sketch paper. It’s a great way for children to practise their powers of observation and hand-eye coordination. How accurately can they accomplish their picture? Alternatively, how well can they achieve different styles of art in their representations? Perhaps showing them some examples of art styles from the Internet or from an art book may inspire them.
Endless Creative Opportunities Using Leaves
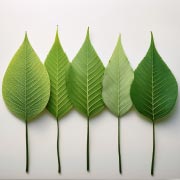 The possibilities are endless when it comes to creating art and design inspired by leaves. As well as making attractive designs with leaves, it’s also possible to take things a few steps further. For example, can your child find a leaf shaped like a heart and use it as the key element in a Valentine’s Day card? Can they make an attractive birthday card using leaves arranged to look like a big flower?
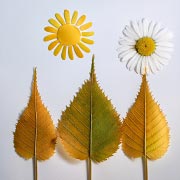
 Can they incorporate leaves into a collage depicting a scene in a park, with leaves upturned as trees, moss as grass, a flower as the sun, and little twigs or pencil lines added to represent stick people? Can children use pressed flowers to make a lovely bookmark or keepsake for a friend or relative? The list of possibilities is immense! It’s also all great fun and highly creative, while helping children master new skills, use their imaginations, and support multiple areas of the EYFS. And, as we said in last month’s post, it’s something different for children to do indoors, yet still involving nature and elements of Forest School.
Nursery Places for Under-5s in Clayton-le-Woods
High-Quality Weekday Childcare Near Chorley

 Little Acorns is a fabulous childcare nursery in Clayton-le-Woods, near Chorley, Lancashire. We cater for children from 3 months to primary school age, and give babies, toddlers, and pre-schoolers a wonderful start in life. Attending this high-quality childcare setting ensures that children are as school-ready as possible by the time they leave us — ready for success!
Little Acorns Nursery has a ‘Good’ Ofsted rating and supports funded childcare hours for eligible children as young as just 9 months. Forest School sessions are popular at Little Acorns Nursery, as are our comprehensive facilities that include a brand new Sensory Room. The nursery opens early, at 7:30 a.m., and stays open until 6:00 p.m. — very convenient for working families.
Register for a nursery place today, or simply get in touch with any queries or to arrange a guided visit with your child:
Little Acorns is a childcare nursery in Clayton-le-Woods, near Chorley, representing a convenient choice for anyone living nearby in towns and villages that include Clayton Brook, Clayton Green, Penwortham, Farington, Bamber Bridge, Whittle-le-Woods, Lostock Hall, Leyland, Pippin Street, Buckshaw Village, Thorpe Green and Euxton.